Beginning its stable development in the early 1800s, in almost 200 years, the camera evolved from a plain box that took blurry photos to the high-tech mini computers found in today’s DSLRs and smartphones. Starting from a wild thought in the 5th century B.C. which led to the creation of camera obscura, the first tangible ancestor of all cameras we use and love today, the art of photography created for itself an amazing history which should not be forgotten.
As mentioned earlier, camera obscura, an invention discovered by an Iraqi scientist started the evolution of photography, but, back then, the camera did not record images, it could only capture and project them to a nearby surface. The first camera obscura used a pinhole in a tent to project an image from outside the tent into the darkened area. It was not until the 17th century that the camera obscura became small enough to be portable.
The first permanent images came to life in the late 1830s in France. The mind behind this discovery was Joseph Nicéphore Niépce. He used a portable camera obscura to expose a pewter plate coated with bitumen to light. This is the first recorded image that did not fade quickly. Shortly after, photography progressed very rapidly. From daguerreotypes to emulsion plates, to wet plates, the art of photography grew to be a worldwide possibility, everybody being able to capture inside an image all the important moments.
Now, images are found in many formats, all slightly different from one another. There are numerous image file types out there so it can be hard to know which file type best suits your image needs. Some image types such a TIFF are great for printing while others, like JPG or PNG, are best for web graphics. A few of the most popular image file formats are TIFF, JPG, PNG, BMP and GIF.
TIFF or Tagged Image File Format files are lossless images files meaning that they do not need to compress or lose any image quality or information (although there are options for compression), allowing for very high-quality images but also larger file sizes.
BMP or Bitmap Image File is a format developed by Microsoft for Windows. There is no compression or information loss with BMP files which allows images to have a very high quality, but also very large file sizes. Due to BMP being a proprietary format, it is generally recommended to use TIFF files.
JPEG, which stands for Joint Photographic Experts Group is a “lossy” format meaning that the image is compressed to make a smaller file. The compression does create a loss in quality but this loss is generally not noticeable. JPEG files are very common on the Internet and JPEG is a popular format for digital cameras, making it ideal for web use and non-professional prints.
GIF or Graphics Interchange Format files are widely used for web graphics, because they are limited to only 256 colors, can allow for transparency, and can be animated. GIF files are typically small in size and are very portable.
PNG or Portable Network Graphics files are a lossless image format originally designed to improve upon and replace the GIF format. PNG files are able to handle up to 16 million colors, unlike the 256 colors supported by GIF.
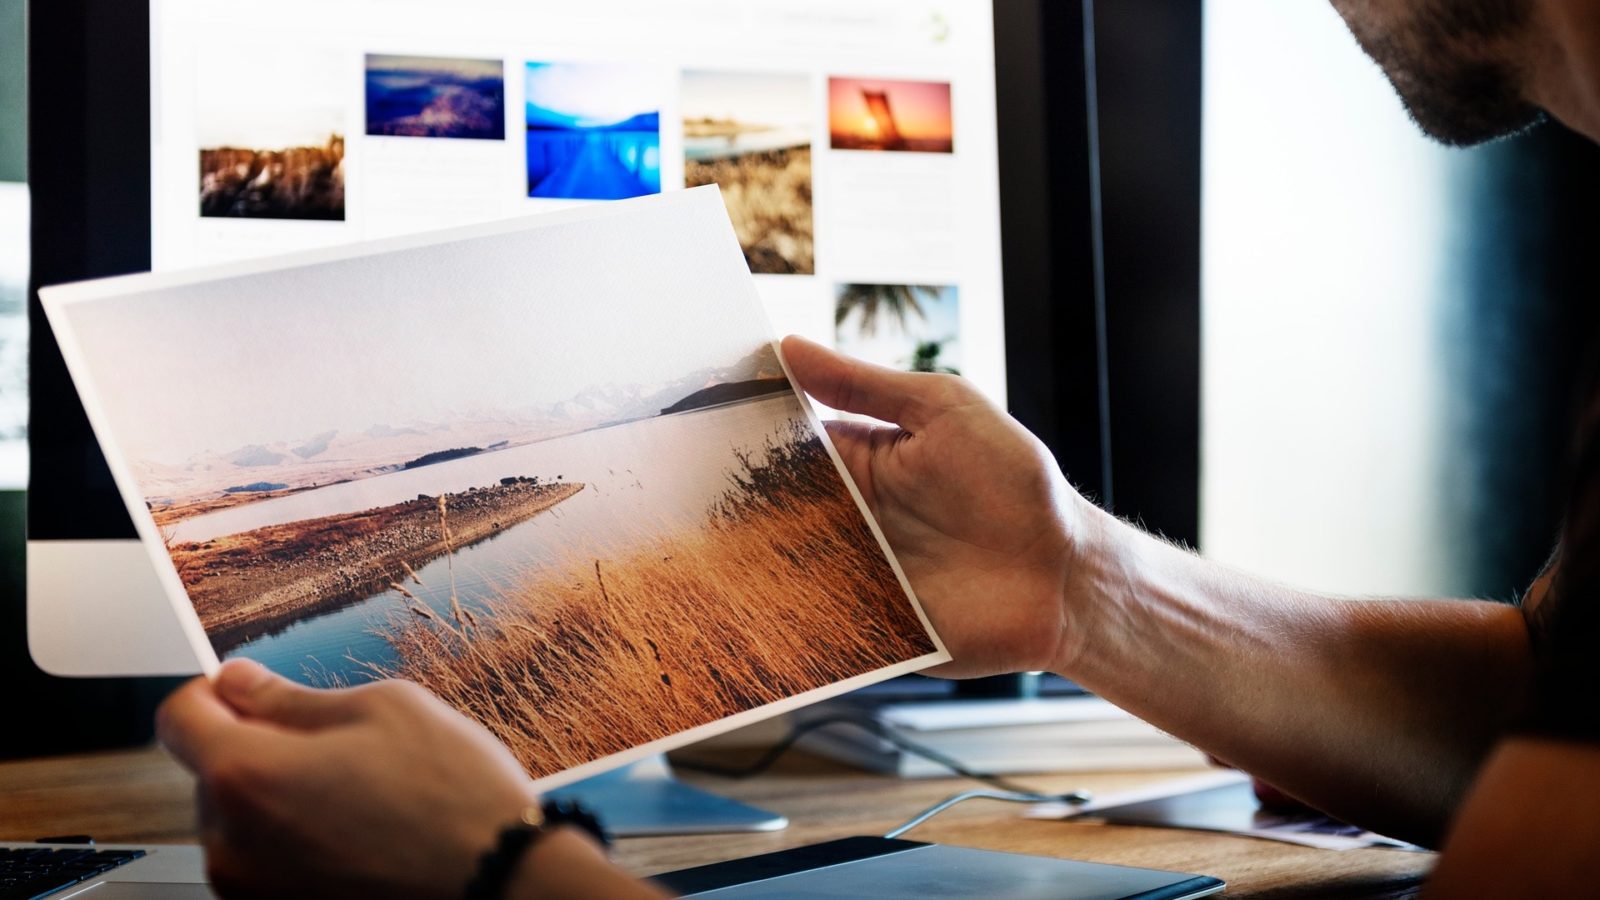
Of course, with the constant development of the Internet, photography became a must for web businesses which take up a high percentage of today’s most common business choice. This way the preference for the Internet influenced the growth of websites, and with that also grew the possibility for an image to be stolen from its rightful owner. To prevent this kind of outcome, many, if not all of the website owners, use some kind of watermark. This way, even if the image is stolen, others can still see where it came from in the first place. It’s very important to take this kind of precaution if the main intention is for the website to grow, and to stand out in front of all the others.
Of course, watermarks are not the only type of text you can add to an image, as with the development of the Internet centered media, and of the electronic devices we now use, a lot of people are constantly looking for some kind of a lock screen for their laptops, desktops or phones; or even premade templates for a new idea they have. Most of the time, this kind of images require some quotes, some inspiration text to motivate the users to achieve their wildest dreams.
Text on images can also be used for personal reasons. For example, to better remember the most important moments, you can add the date and time to images and save them in your computer.
Many different apps were created to serve the purpose of editing images, but most of them are too complicated or do not provide all the features you would need. On Mac, one of the best apps specialized in image editing is Image Plus. The app is easy to understand, is compatible with all the formats listed earlier, and provides all the needed features. The app can be used to completely change an image or to simply adjust some imperfections here and there.
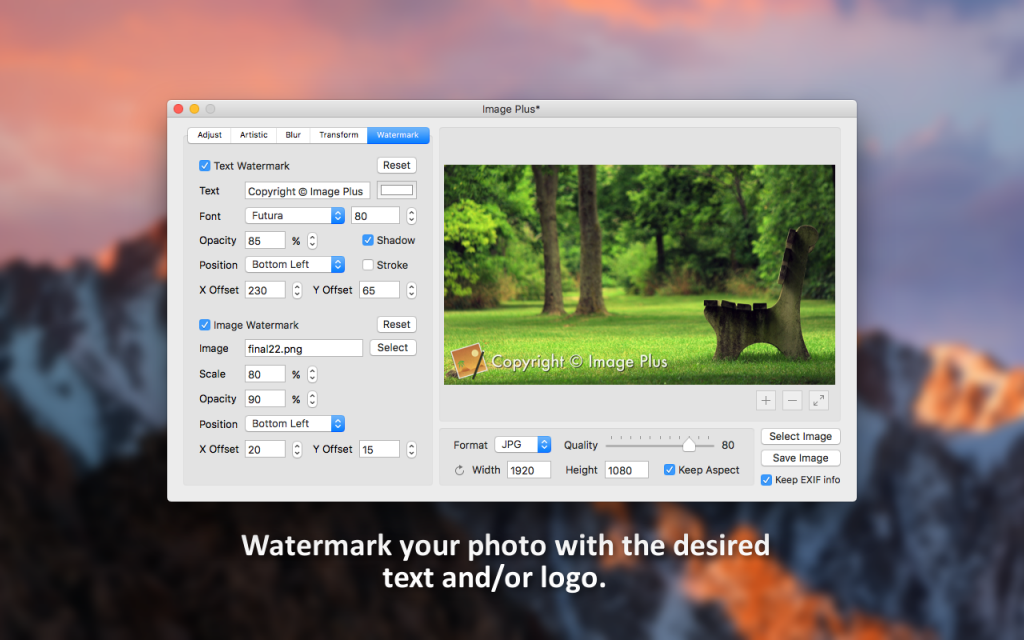
The process of adding text to your pictures is extremely simple. All you have to do is add an image by clicking on the Select Image button placed in the bottom right corner and go to the Watermark option placed in the top left corner. After that, all the provided features should appear on the left side. The app lets you add either a text watermark or an image one. To add a text watermark you will have to select the corresponding option, and after that, you can start working on your text. You can choose any font and color you want. You can change the opacity and the position of the text, and in addition, you can add shadows and strokes.
All the changes you make can be seen at all times in the preview image shown on the right side. You can also reset all the edits by clicking the Reset button placed next to the Text Watermark option. After you are done with all the changes, all you have to do is choose a Format for your image, the Quality, the Width, and the Height.
To finish the process, you will have to click on the Save Image button placed under the Select Image button and select the folder in which the image will be placed. After that, your picture will be done and ready to be used.